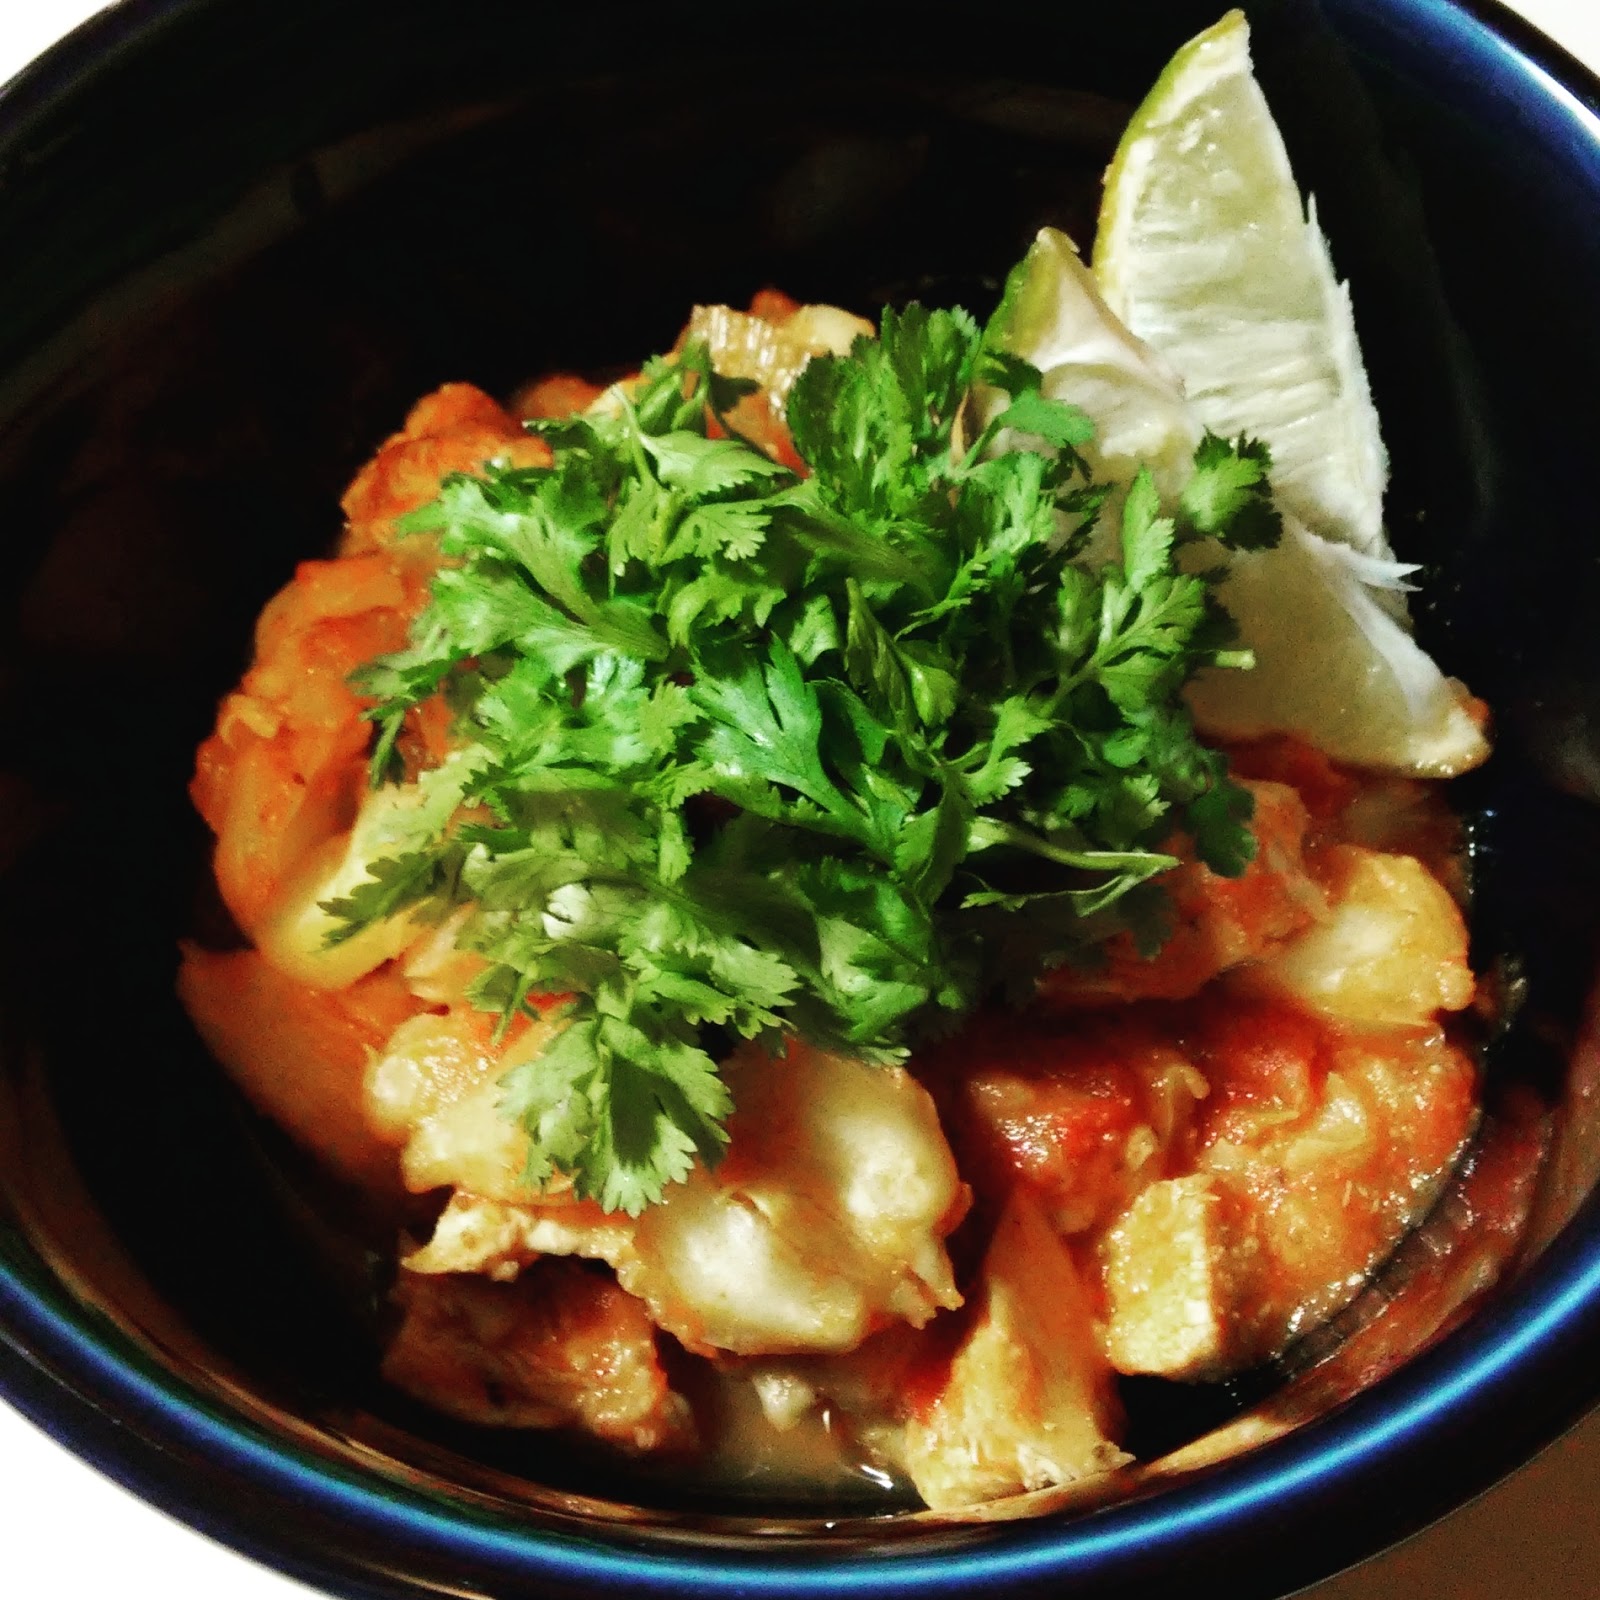
Tuesday, September 15, 2015

Pozole Rojo

Pozole Rojo

My brother and I can't remember a time when we didn't have hominy at least once a week. It was a staple in our vegetarian house and was among the few dishes our mom cooked well. The few dishes she makes regularly are excellent and well-loved in our family (she just called and is making enchiladas for my cousin's birthday as I write this). BUT, I can count them on one hand, which is certainly one of the reasons my brother and I became the cooks we are today.

This is my cabinet o'beans that I'm trying to work my way through because, really, who needs this many beans? Have you ever tried to make beans a major portion of your diet in the summer? You definitely have to be creative because most bean dishes I like are hot dishes and not conducive to the hot, humid days we've had recently. That's why the recent cooler weather made me jump at the chance to use the hominy that's been stowing away among the beans for who knows how long.

Cabinet O'Beans

The more I read about traditional pozole, the different varieties depending on location, and its cannibalistic past, the more I just want to give you guys a ton of links to a bunch of weird Aztec stories and go on a tangent about all the creation stories I studied in my Native American Indian Music course in undergrad...

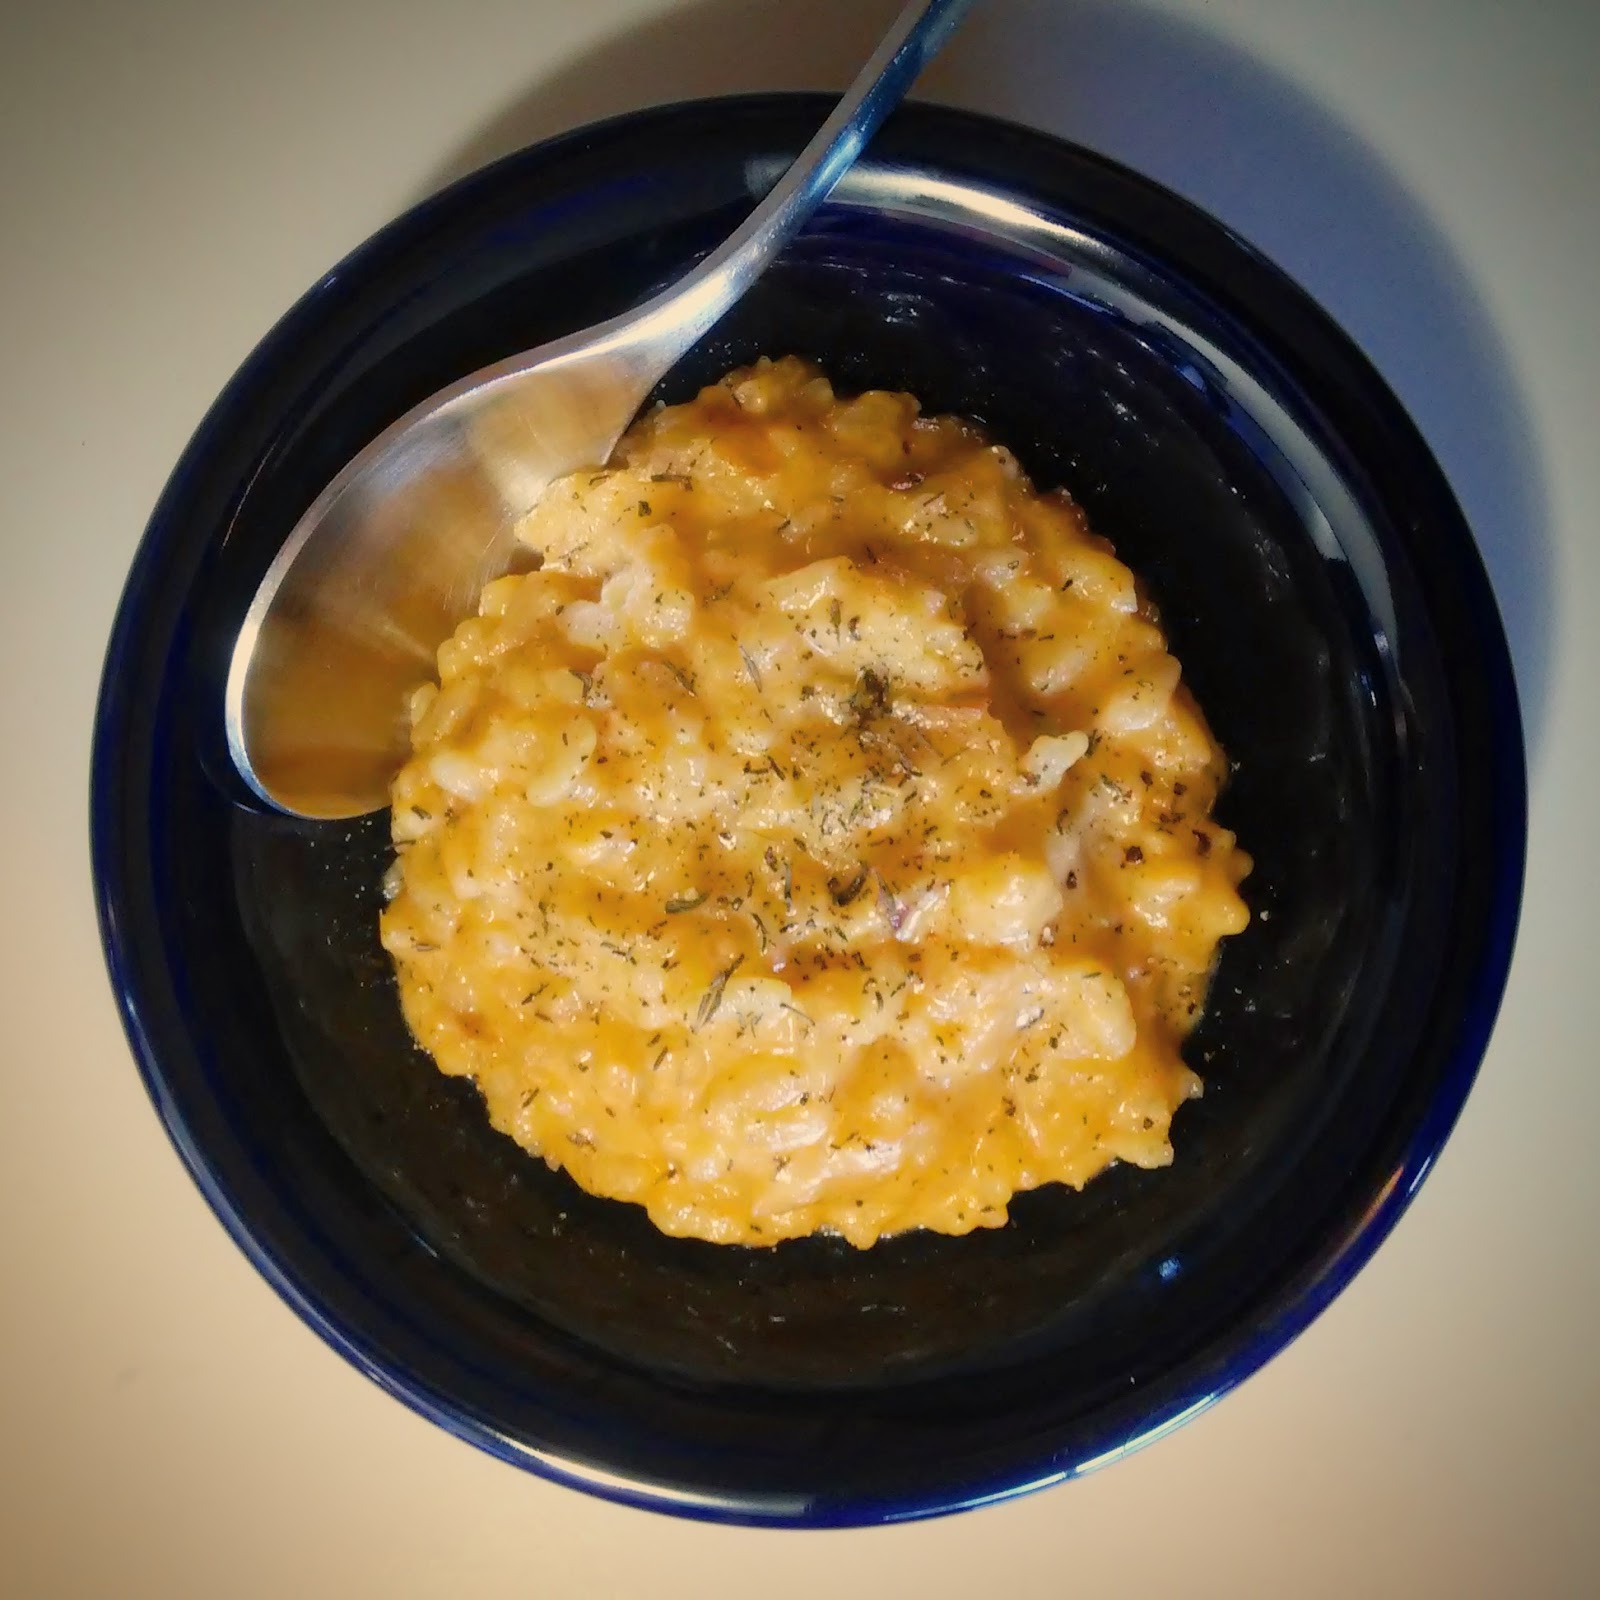
Typically, this stew is made from hominy and meat, most commonly pork or chicken but the base, veggie additions, and toppings vary. The hominy is what gives this dish it's unique flavor and the hominy cannot be substituted. You can use the dried or canned variety, but I prefer the canned just because I never feel like I get the dried version soft enough. This can also easily be made vegetarian by swapping out the chicken stock with veggie stock and omitting the cooked chicken or pork. And while we're on that topic, don't cook your meat with the soup because it will become very dry and tough before the soup is done. I usually marinate in a little lemon juice then just grill my chicken on the Foreman or filet+sauté in salt, pepper, and garlic, but pat dry before sautéing if you do the later.

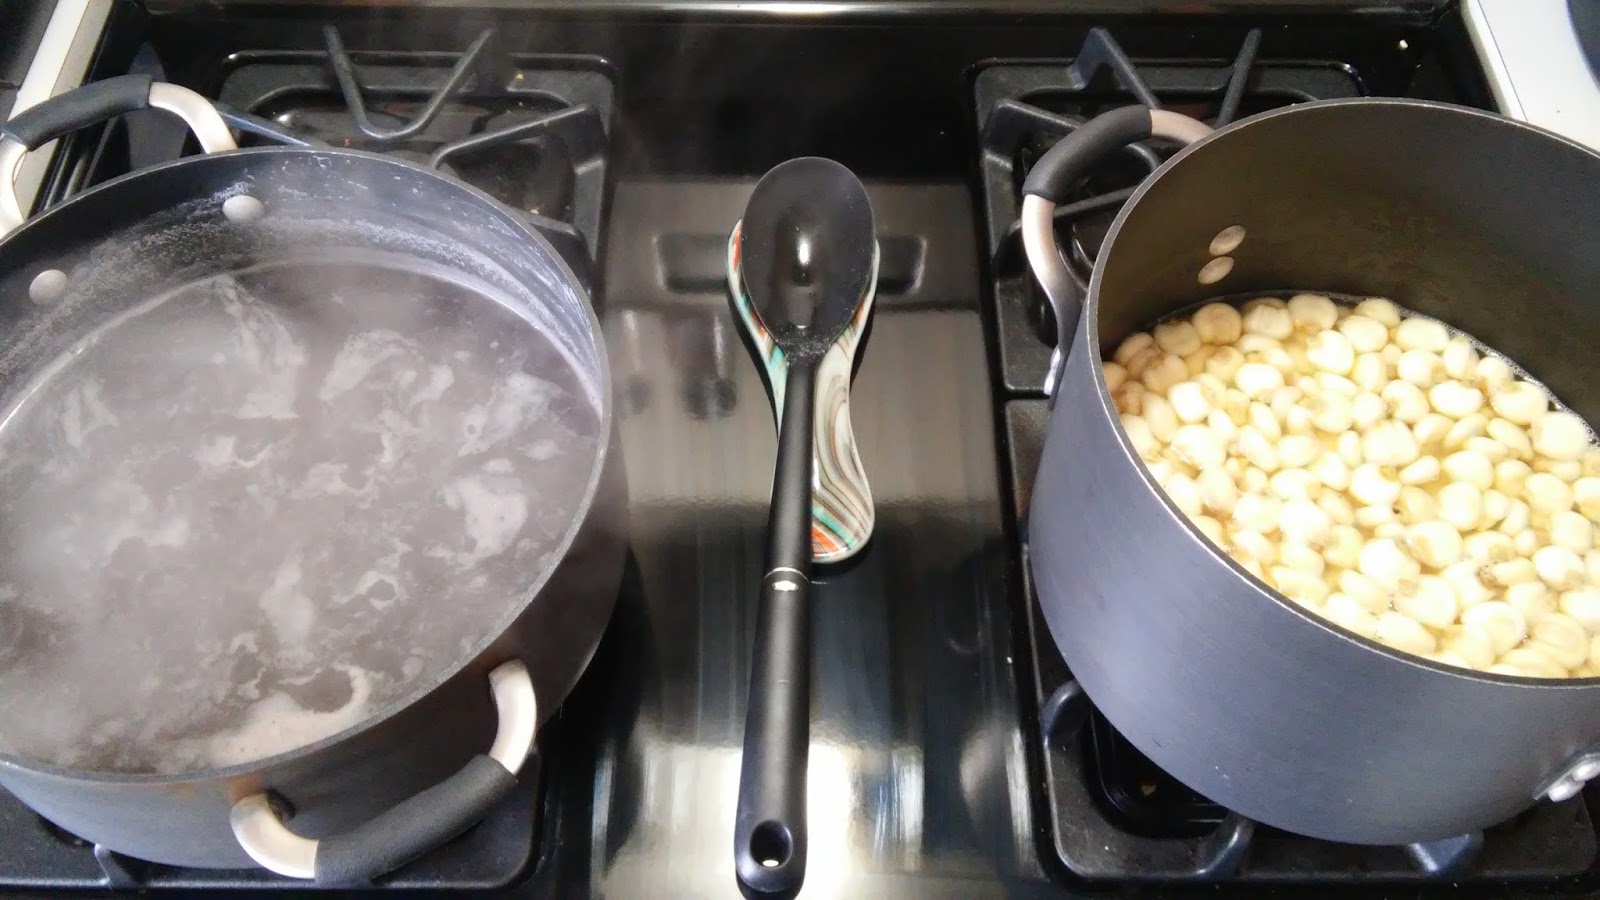
Cooking dried, rehydrated hominy (right).

Even among the rojo (red) varieties there are variations in what makes it red, usually dried red chiles or in my case, tomatoes. I still add fresh chiles to mine, but it all depends on what looks good in the market that week or what my friends share with me from their family's recent shipment of hatch chiles or whatever came in my CSA box (I've been making this dish a long time). Toppings I enjoy are cilantro, shredded Napa cabbage, chopped shallots (or red onion), thinly sliced radishes, lime wedges, and occasionally some sliced avocado and mildly flavored queso fresco. You can seriously dump almost any other veggie into the pot and it will be great. I've even used asparagus coins once because a friend shared an enormous amount and I just couldn't use it fast enough. I'm serious, literally anything.

Ingredients:
  1. 2 Tbsp olive oil or canola oil
  2. 2 Tbsp chopped garlic
  3. 1 yellow onion, coarsely but evenly chopped
  4. 1-3 peppers of choice, chopped (de-vein for less heat)
  5. 1 large can plum tomatoes, cubed or crushed (preferably San Marzano variety), including juices
  6. 4 cups chicken stock
  7. 2 cans hominy, including juices
  8. **or ** 2-3 cups dried, rehydrated, cooked hominy including 1-2 cups cooking water
  9. 1/2 tsp ground cumin
  10. 1/2 tsp dried oregano, crushed
  11. 1/4 tsp celery seeds
  12. 2-3 bay leaves
  13. 1/8 tsp red pepper flakes (optional)
  14. salt and pepper to taste
  15. cooked chicken or pork

Topping options:
  1. Napa cabbage, shredded
  2. shallots or red onion, chopped
  3. green onion, chopped
  4. radishes, thinly sliced
  5. limes, wedges
  6. cilantro, coarsely chopped
  7. avocado, sliced
  8. queso fresco, crumbled

Instructions:
  • Heat oil in large stock pot on medium heat.
  • Sauté garlic and onion for 3-5 minutes or until onion is slightly translucent.
  • Add chopped pepper, sauté and additional 2-3 minutes or until pepper starts to become soft and release it's moisture.
  • Add the tomatoes (entire contents of can) and sauté 2-3 minutes to heat tomatoes and they start to release moisture.
  • Add the chicken stock and hominy.
  • Turn the heat up to highest setting and bring to a boil.
  • Boil 2-3 minutes and reduce heat to a simmer.
  • Add the cumin, dried oregano, celery seeds, bay leaves, and red pepper flakes (optional).
  • Salt and pepper to taste.
  • Simmer until liquid is slightly thickened and hominy is soft, but not complete mush. 
  • Remove bay leaves.
  • Garnish with desired toppings and serve. 

Sunday, September 13, 2015

Spaghetti Squash with Deconstructed Pesto

https://australianpastafarianlobby.files.wordpress.com/2013/04/arrrgh.jpg

All hail his holy carbiness! This was my first time cooking spaghetti squash on my own and I've been watching all your Pinterest boards for months on how to perfectly cook this monster into something that closely resembles one of our most beloved form of carbs. I have tons of basil from my recent harvest, so that's where the pesto comes in. The deconstructed business is only because Thomas Keller has spoiled my taste buds and contrary to popular belief, I don't always like to completely homogenize everything I eat. (I'm going to make the best old person with my mechanically softened diet!)

I'll talk about my tips from my own experience in this post, but if you want to see the "research" I did on how to cook spaghetti squash well and the many methods for cooking spaghetti squash, go here.

This was a great dish to prepare ahead of time and take with me to see The Piano Guys at Ravinia. It went well with the picnic my friends and I put together, but I would suggest keeping the basil separate until just before serving so it doesn't wilt overnight.

Here are some awkward photos my friends allowed me to take of them eating this dish. They enjoyed eating it far more than enduring my poor photog skills. I know, they look so happy and excited!

Ingredients:
  1. 1 spaghetti squash
  2. 4 Tbsp olive oil, reserved
  3. 2 Tbsp chopped garlic
  4. 1/4 cup chopped pine nuts
  5. 1/3 cup Parmesan or Romano cheeses or mix of both
  6. kosher salt
  7. coarsely ground black pepper
  8. 2 cups fresh basil leaves (large bunch), julienned
  9. 1-2 Tbsp balsamic vinegar
Instructions:
  • With a sharp knife, pierce spaghetti squash 5-6 times.
  • Microwave on high for 5-10 minutes, depending on the size of your spaghetti squash.
  • Remove from microwave and allow to cool for 20-30 minutes.
  • Slice into rings (width-wise).
  • Remove seeds from center of rings and set aside
  • Remove strands from rings, discarding the thick outer skin.
  • If strands are excessively moist, line a colander with paper towel, place strands into lined colander, and allow to drain for 10-15 minutes.
  • Heat a deep sauté pan over med-low heat.
  • Add 2 Tbsp olive oil and chopped garlic, sauté 2-3 minutes or until lightly browned.
  • Add chopped pine nuts, sauté and additional 1-2 minutes or until pine nuts have become slightly transparent. 
  • Add spaghetti squash strands and turn heat to low, sauté 5-10 minutes or until most of the moisture from the squash has evaporated. 
  • Remove from heat, add cheese(s), remaining olive oil, and julienned fresh basil.
  • Salt and pepper to taste.
  • Add balsamic vinegar just before serving. 
Spaghetti Squash After-Party:
For an additional snack, prepare the seed as you would with pumpkin seeds!

Just make sure you clean them soon after removing them during squash prep. Let them sit out overnight to dry adequately. Toss them in olive oil and roast on your oven's lowest setting until seeds are crispy (about 20-30 minutes). Toss with seasoning and enjoy!


Spaghetti Squash Research


This post is supplemental to the Spaghetti Squash with Deconstructed Pesto post. I wanted to share the sites I used as a guide for how to cook the spag better, but didn't want to bog down the post about the recipe.

Following are a few Pinterest finds related to cooking spaghetti squash. I haven't tried all the recipes, but I'm sure I'll experiment with most of them soon (especially now that I have them in one easy list). As always, if you have any tips or suggestions, please leave me a comment!

Cooking instructions for Spag n00bz:
Recipe ideas:
If you don't feel like waiting for all these links to open and slow down your computer and cause your favorite Spotify mix to skip, here is a summary:
  • If you want long strands, cut your squash along the width. If you want short strands, cut it along the length. 
  • Seeds can be saved, cleaned, and roasted similarly to pumpkin seeds. 
  • A popular method for removing some of the excess liquid is to sautee the strands for several minutes. Another method is to line a colander with paper towel and let the cooked strands drain off any excess liquid. 
  • The various methods for cooking include microwave, oven, crockpot, or pressure cooker (just hearing these words give me nightmarish flashbacks to all the bland bean dishes of my vegetarian childhood!). Microwaving seems to be the chosen method for most people because it's the fastest. 
    • Microwave: pierce squash in several places to allow steam to escape, microwave 5-10 minutes or until soft. Slice, remove seeds, and tease apart strands with fingers or a fork.
    • Oven: bake temps and times vary, but most bake at 375-400F for 45-60 minutes. If going the long-strand route, slice into rings, remove seeds, and bake on a nonstick surface (parchment paper or a Silpat mat). If going the short-strand route, slice along the length, brush the inner flesh with olive oil, season with salt and pepper, and bake skin-side up. Allow squash to cool and tease apart strands.
    • Crockpot: pierce in a few places for steam to escape, place in crockpot with 1 cup of water or broth, and cook on low for 8 hours or until soft. This seems unnecessary since the microwave route is faster and super easy. I'll have to try this to see if the flavor/texture are improved with this method, otherwise I just don't see the point.
    • Pressure Cooker: not many details here as this isn't a popular method among bloggers, but most need to be cut along the width to fit into the cooker. Remove seeds and cook for 15 minutes. And don't be dumb when releasing the steam at the end! (It would violate HIPAA for me to describe all the pressure cooker-inflicted burns I treated last year.) Allow squash to cool and tease apart strands.

Wednesday, August 19, 2015

Uber Protein Muffins

An update to the Uberfiber Muffins, which weren't uber enough for me:


Now they're Uber Protein Muffins and are getting nutritionally closer to replacing Cliff Bars for my easy-on-the-stomach, high-protein breakfast. This version also fixes the dryness of the previous batches. Updated recipe is below the nutrition comparison. While they have more fat than a Cliff Bar (from the flax seeds and peanut butter), the Uber Protein Muffins have fewer total calories, half as much sugar, half as many carbs, almost as much protein, and exactly the same amount of fiber. I'd like to increase the fiber with either some dried apricots or chopped almonds, which will also bump the protein a bit. If you have any suggestions, please leave me a comment!


Uber Protein Muffin nutrition facts (made with MyFitnessPal):

Ingredients:
  1. 1/4 cup whole flax seeds
  2. 3 bananas, peeled
  3. 3 eggs
  4. 1 1/2 cup chunky peanut butter
  5. 3 Tablespoons honey
  6. 1 Tablespoon vanilla extract
  7. 1 teaspoon baking soda
  8. 1 teaspoon ground cardamom
  9. 1 teaspoon ground ginger
  10. 1 teaspoon kosher salt
  11. 3/4 cup oats (either quick-cook or steel-cut will work)
  12. 1/4 cup unsweetened applesauce
  13. 1/4 cup hemp protein powder (can find this at Trader Joe's)
  14. 1/2 mini semi-sweet chocolate chips (dark, if you can find them)
Directions:
  1. Preheat oven to 400F. Prepare muffin pan by greasing each well with canola oil or using paper liners. 
  2. Coarsely grind flax seeds in a blender or spice grinder, just enough to break open the seeds. (No need to completely pulverize.) 
  3. Add ground flax seeds and ingredients 2-13 to a stand mixer or large bowl and blend until mixed well. 
  4. Add mini chocolate chips and stir (on low if using the stand mixer) to incorporate
  5. Fill each muffin well with 1/4-1/3 cup of batter.
  6. Bake for 12-15 minutes or until a knife inserted into the center comes out mostly clean (no wet batter, but moist crumbs are ok). Carefully watch the edges so the bottoms don't burn, especially if your muffin pan is on the thinner side. (My thick, expensive pan from Williams and Sonoma didn't have this problem, but the second pan I used did. Note the dark sides on some of the muffins in the photo above.)
  7. Makes 18-20 muffins.
I made a couple batches to experiment with ingredients, proportions, and taste. Now that I have so many, I'm experimenting with freezing 3/4 of them to use slowly over the next few weeks. Will let you know how the defrost goes. 


Monday, August 10, 2015

Sweet Pumpkin Risotto


My original insomnia-fueled idea was basically rice pudding but with a custard base: arborio cooked in milk and brown sugar, spiced with cinnamon, clove, nutmeg, and cardamom, then add an egg yolk to make it a custard, and add pureed pumpkin at the end. I also wanted to top it off with orange zest and julienned basil.

I still want to try the above idea, but that's not exactly what I ended up making. I didn't have any eggs, so I didn't go the custard route. But I'm not sure if it even needs it since it took 5 cups of milk before the arborio was the right texture. Because of all the milk, it's already super rich and I'm not sure how the custard will fit in with this. (Just going to have to experiment more!) I used honey instead of brown sugar (again, because I was out) and I like the more subtle warmth the honey gives. I ended up using store-bought, pre-ground cinnamon instead of my usual Indian market cinnamon bark I grind myself. It works, but it's a different flavor from what I'm used to and the texture isn't as smooth. I didn't have nutmeg, but I used ground ginger since I have almost as much ground ginger as I have arborio riceI think I might also add some pure vanilla extract next time. The dried cranberries are a great, tangy balance to all the richness of the dish and might even be a better compliment than the orange zest I originally suggested.

Special note on spices: Don't be afraid to buy whole spices and grind them yourself, it's easier than you think! I like to get mine from local Indian markets because they're a lot less expensive and better quality (more potent). All you need to grind them is an inexpensive blade coffee grinder. This grinder needs to be exclusively for spices (not coffee beans) and should be cleaned soon after grinding to avoid unwanted flavors lingering in the grinder and mixing with future spices. Another inexpensive and helpful tool is a zester, which grates citrus and whole nutmeg. 


Ingredients:

  • 1 Tablespoon olive oil
  • 1 Tablespoon butter
  • 1 cup arborio rice
  • 4-5 cups milk, reserved
  • 2-3 Tablespoons honey, to tase
  • 1/8 teaspoon ground cinnamon
  • 1/8 teaspoon ground cloves
  • 1/8 teaspoon ground ginger
  • 1/8 teaspoon ground cardamom
  • salt to taste
  • 1 can plain pumpkin (the kind you use for pies, but not the giant can)
  • Optional: dried cranberries
Directions:
  1. Heat pan on medium-low, then add olive oil and butter.
  2. Add arborio and sauté until outer layer becomes clear (2-3 min). 
  3. Add 1 cup milk, turn heat down to low so milk doesn't thicken and burn too quickly. 
  4. Add honey, cinnamon, cloves, ginger, cardamom, and salt to taste. 
  5. As the sauce thickens, add 3-4 more cups milk, ONE BY ONE, until rice is soft and you have the consistency of a Béchamel sauce 
  6. Turn heat to lowest position and start slowly adding the canned pumpkin, stirring constantly. 
  7. Cook on low for 3-4 more minutes to let pumpkin thicken slightly.
  8. Move to a cool burner, salt until the flavor pops
  9. Top with dried cranberries.

Sunday, August 9, 2015

'Otto and Cheese


I can no longer claim to be a poor grad student, but this whole waiting-around-to-start-working thing has been even harder on the dwindling bank account than living off of Uncle Sam while I was still in school. That being said, I've had to get creative with what I already have in my cupboard and right now this includes a lot of arborio rice. I usually use arborio to make rice cream (imagine a cross between vanilla ice cream and rice pudding), but I've been experimenting with other flavors recently. For this recipe I combined two previous dishes I tend to make during the winter, Mac and Cheese (from scratch) and Caramelized Onion and Thyme Risotto. I've experimented with various combinations of of cheese, but I prefer the Zingerman's Roadhouse combo of sharp cheddar and swiss. The stank of this cheese combo goes a long way to compliment the sweetness of the caramelized onion. 

Special note on cheese sauces: While the pre-shredded cheeses are convenient, they're treated with an anti-caking agent and it tends to make the consistency of the sauce gritty. It's less important in this dish, but becomes and issue when making scratch Mac and Cheese.

Ingredients:
  • Olive oil
  • 1 small yellow onion, chopped
  • 1 cup arborio rice
  • 4 cups 2% milk, reserved
  • 1 teaspoon garlic powder
  • 1 teaspoon crushed dried thyme (not ground)
  • 1/2-1 teaspoon kosher salt (to taste, see linked article below)
  • 1/2 teaspoon freshly ground black pepper 
  • 2 Tablespoons champagne wine vinegar, reserved
  • 1-2 cups shredded sharp cheddar cheese
  • 1-2 cups shredded swiss cheese
  • Optional: fresh thyme (leaves removed from stems) and grated nutmeg OR Panko breadcrumbs, crushed dried thyme, and grated nutmeg
Directions:
  1. Heat pan on medium-low, then add a few swirls of olive oil.
  2. Add chopped onion and slowly brown, stirring occasionally so onion browns evenly.
  3. Add arborio and sauté until outer layer becomes clear (2-3 min). 
  4. Add 1 cup milk, turn heat down to low so milk doesn't thicken and burn too quickly. 
  5. Add garlic, thyme, and salt and pepper to taste. 
  6. As the sauce thickens, add 3 more cups milk, ONE BY ONE, until rice is soft and you have a slightly thinner consistency than a Béchamel sauce
  7. Add 1 Tbsp champagne wine vinegar and stir frequently to let acid cook out a tiny bit (1-2 min). 
  8. Turn heat to lowest position and start slowly adding shredded swiss and sharp cheddar (equal parts), while constantly stirring, until you have desired cheesiness. 
  9. Move to a cool burner, salt until the flavor pops and add 1 more Tbsp champagne wine vinegar. 
  10. Top with fresh thyme and grated nutmeg. (Not pictured above because I was out of both.) OR separate into individual ramekins, top with Panko topping, and heat under the broiler until the topping is lightly brown and crispy.

Uberfiber Muffins


I’m always trying to find new things that I can eat for breakfast that are high in protein and fiber and are easy on my finicky stomach. I tried this recipe last winter and it worked really well. It’s rare that you find something on Pinterest that actually works, especially when it’s a recipe. They were very tasty, but the consistency was more moist than I wanted and made them slightly difficult to transfer (I almost always eat breakfast on the go). They’re great because they have a lot of protein, but I wanted to add a little extra fiber and healthy fat, which also helped the consistency. I’m obsessed with adding freshly ground flax seeds to everything lately! Makes 18-20 muffins.


Ingredients:

  1. 1/8 cup whole flax seeds
  2. 2 bananas, peeled
  3. 2 eggs
  4. 1 cup chunky peanut butter
  5. 2 Tablespoons honey
  6. 1 Tablespoon vanilla extract
  7. 1/2 teaspoon baking soda
  8. 1/4 teaspoon ground cardamom (sub cinnamon if you don't have this on-hand)
  9. 1/4 teaspoon salt
  10. 1/3 cup oats (either quick-cook or steel-cut will work)
  11. Optional: dark chocolate chips, raspberries, or orange zest. (Leave me a comment if you come up with other tasty additions!)
Directions:
  1. Preheat oven to 400F. Prepare muffin pan by greasing each well with canola oil or using paper liners. 
  2. Add flax seeds to the blender and grind coarsely, just to break open the seeds. (No need to completely pulverize.) 
  3. Add ingredients 2-9 to the blender with the ground flax seeds and blend until mixed well and bananas are incorporated, but peanut chunks aren't completely broken down. 
  4. Transfer to a bowl and fold in oats and any optional ingredients.
  5. With two regular spoons (one to scoop and one to scrape), fill muffin wells to approximately 1/2 full.
  6. Bake for 10-12 minutes or until a fork inserted into the center comes out mostly clean (no wet batter, but moist crumbs are ok). 
Let me know what you think and enjoy!